Timetable
Timetable
The timetable area of the WordPress manager connects with existing course entries to enable a display of detailed schedules in a variety of formats. Timetable entries are output into many areas of the IHPME website, such as the overall timetable directory and individual program detail pages.
Examples
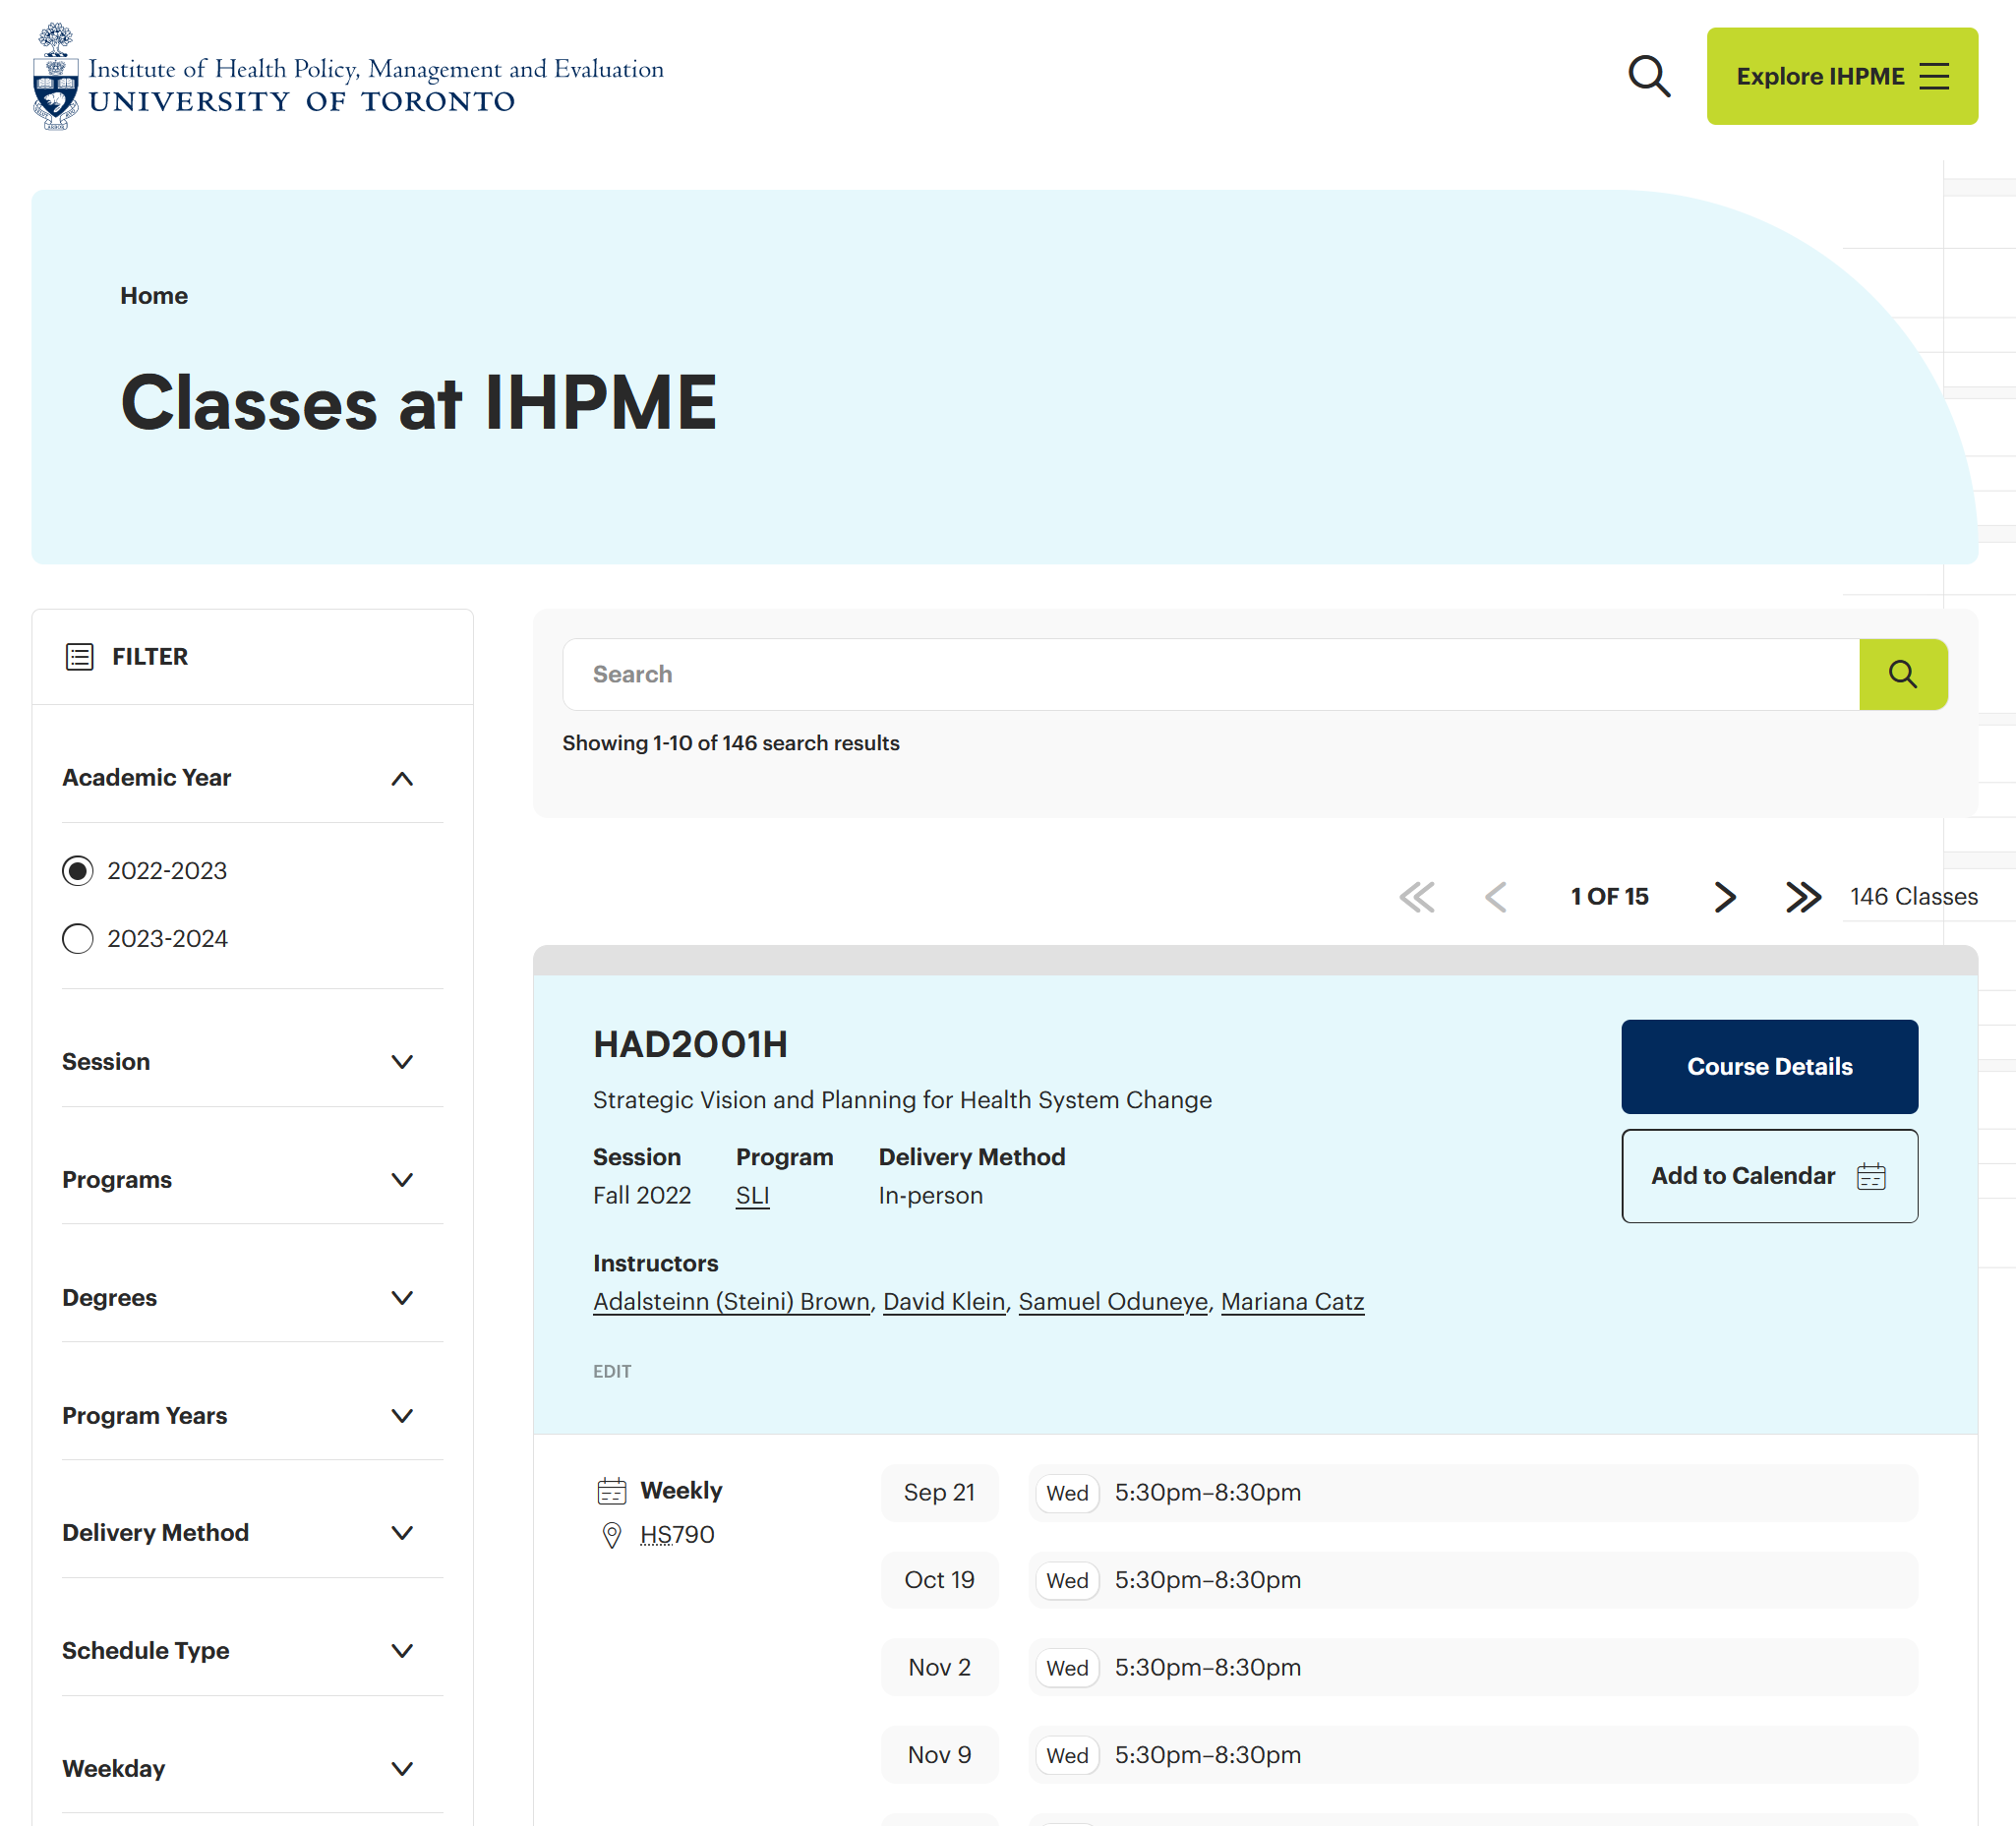
Example of timetable directory on live IHPME website.
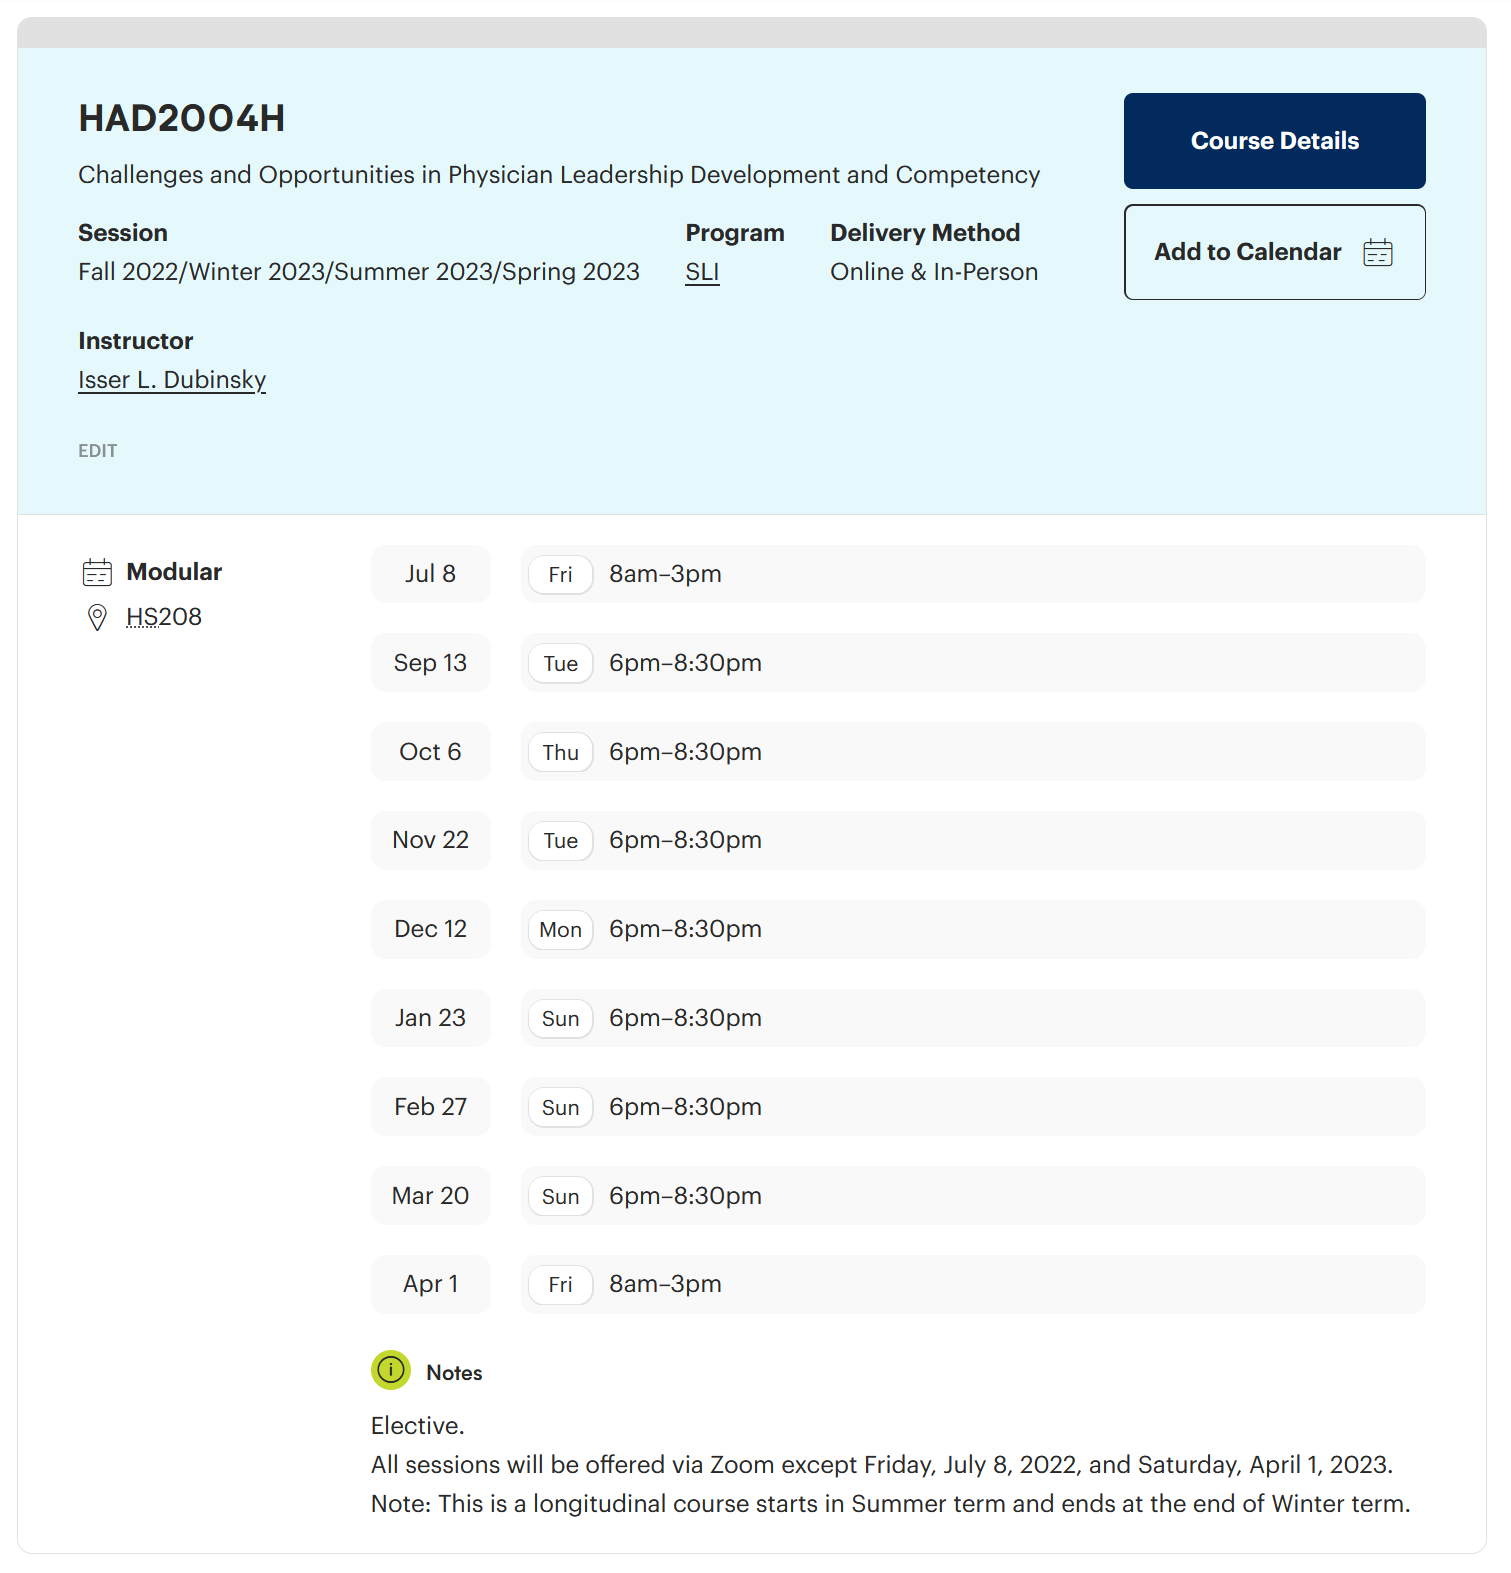
Modular timetable entry example:
Accessing Timetables
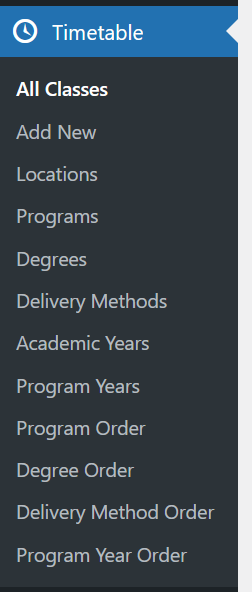
To accessTimetables click or hover over the Timetables link on the left-hand side of the WordPress editor. Here you will be presented with a several options.
Timetable editor options
There are many options available within the Timetables menu, most of which are relegated to administrator access only.
Example of WordPress sidebar:
All Classes
Provides a listing of all class timetable entries currently saved within the WordPress database.
Add New
Adds a new timetable entry to the database for editing.
Locations
Configures the listing of available locations within the WordPress database.
Programs
Configures the listing of available programs within the WordPress database.
Degrees
Configures the listing of available degrees within the WordPress database.
Delivery Methods
Configures the available delivery methods for the timetable entries.
Academic Years
Configures the available academic years offered for timetable entries.
Program Years
Configures the available program years offered for timetable entries.
Program Order
Configurable order of all programs currently available within IHPME.
Degree Order
Configures order of available degrees memberships.
Delivery Method Order
Configures order of available delivery methods.
Program Year Order
Configures order of available program years.
Editing & Creating Timetable Entries
Adding a new class
To add a new class, select or hover over the Timetables menu item on the left-hand sidebar and click "Add New".

Finding an existing timetable entry
To find a timetable entry within the WordPress editor, select "All Classes" from the Timetables sidebar menu. This will display a listing of all available classes in the WordPress editor.
List view of All Classes:
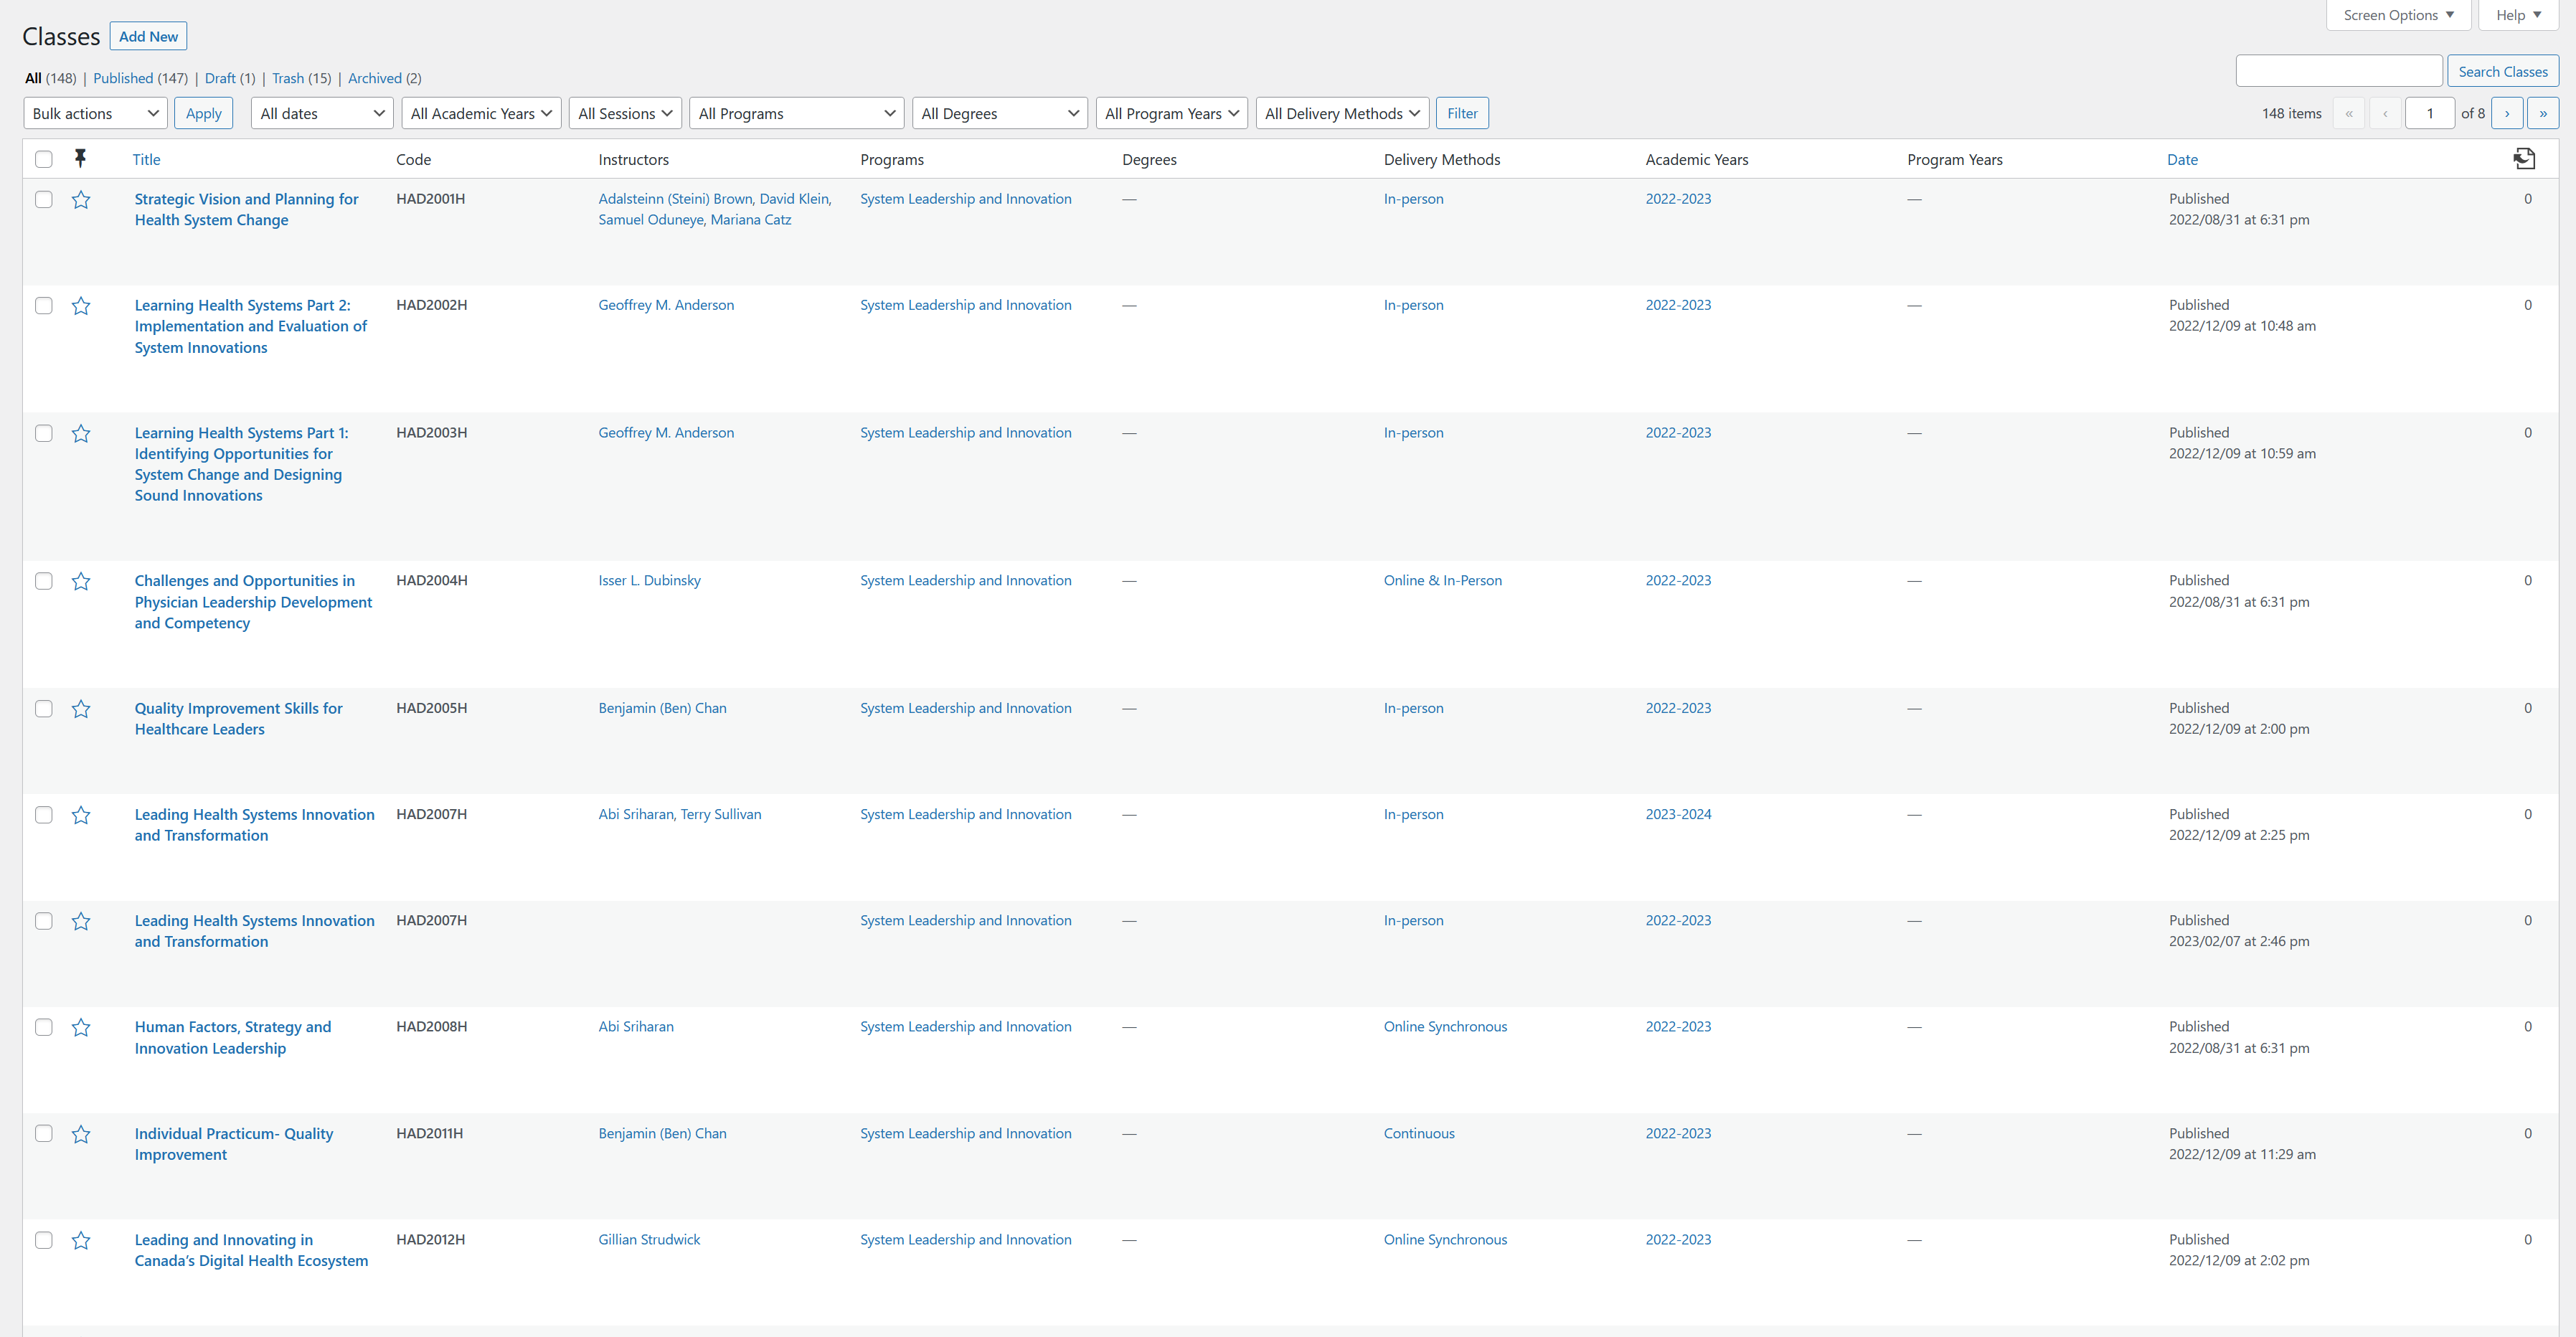
From the list view of all classes, you can filter the available results by several methods:
- Search Field: Search for a specific class by name (upper right-hand corner).
- Dropdown filters: Provides several options to filter by date, academic years, sessions, program, degrees, and program years.
- By page: Allows jumping to a specific page or advancing forward/backwards within the listing of classes.
Viewing a timetable entry
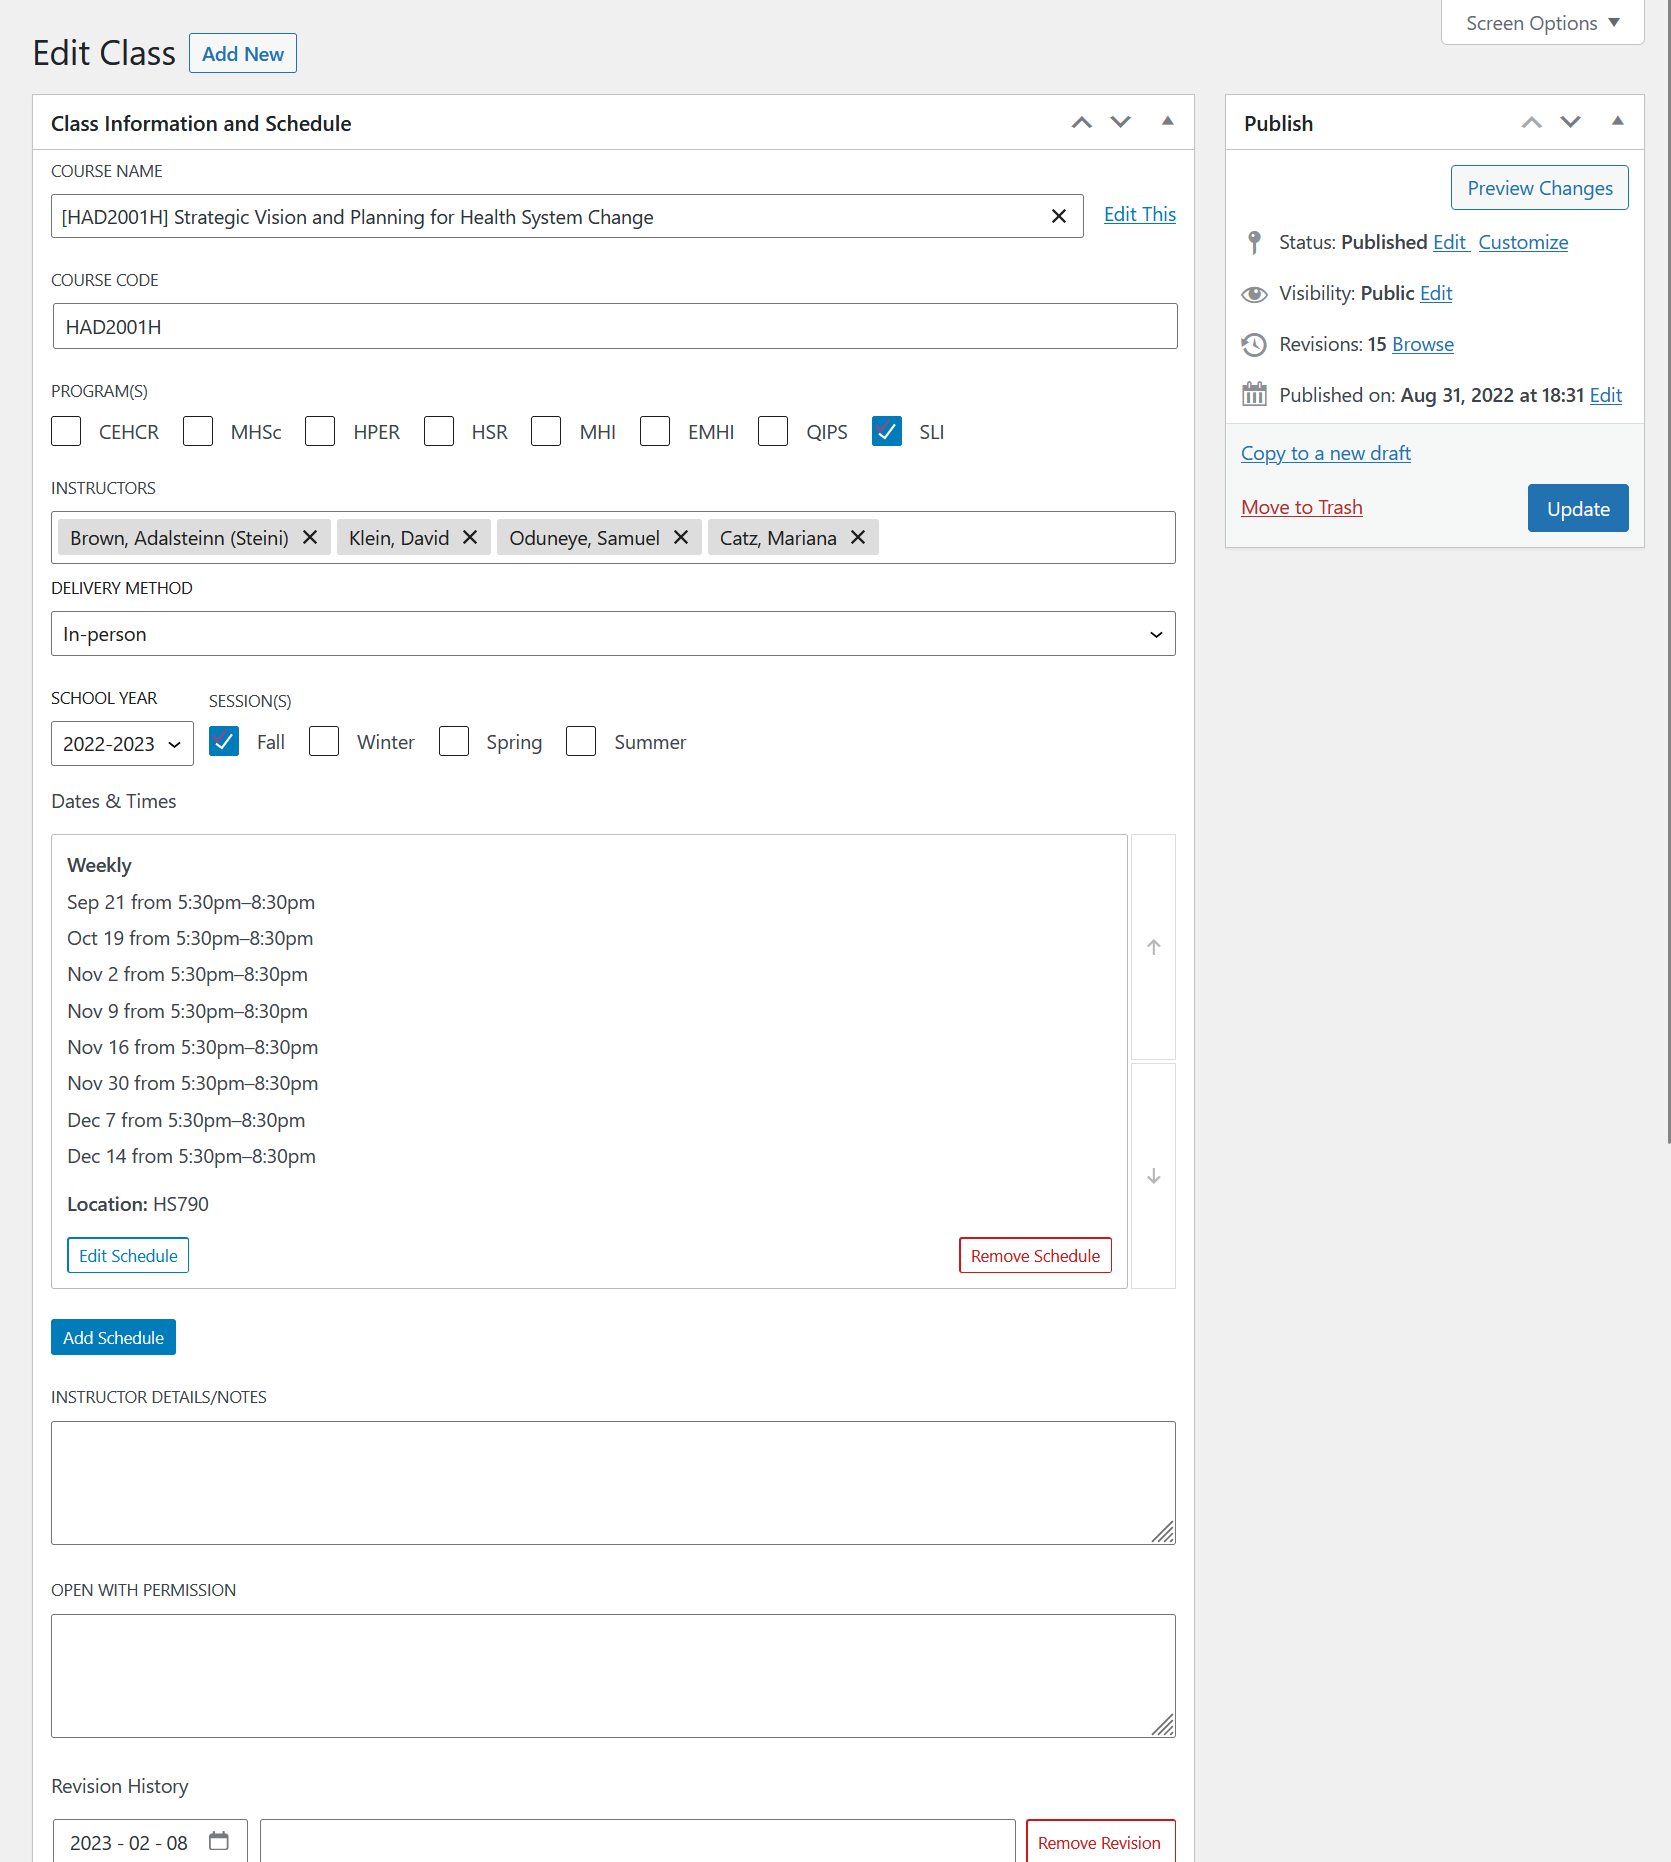
Below is an example of an existing Timetable within the WordPress editor. Timetables feature a limited amount of editable features. Timetable entries (where possible) also draw in content from existing course entries to help mitigate duplicate content or inaccuracies throughout the database. See course entries for creating new courses.
Editing a timetable entry
Course name
The course name of the timetable entry can be edited by inputting a name into the first field available below the heading "Edit Class".
Begin by typing in the name of existing course. This will bring up an autocomplete suggestion.

By selecting an existing course name in this field, it will automatically populate the course code, programs, instructors, delivery method, school year, and sessions field if they have been configured already on the course page itself.
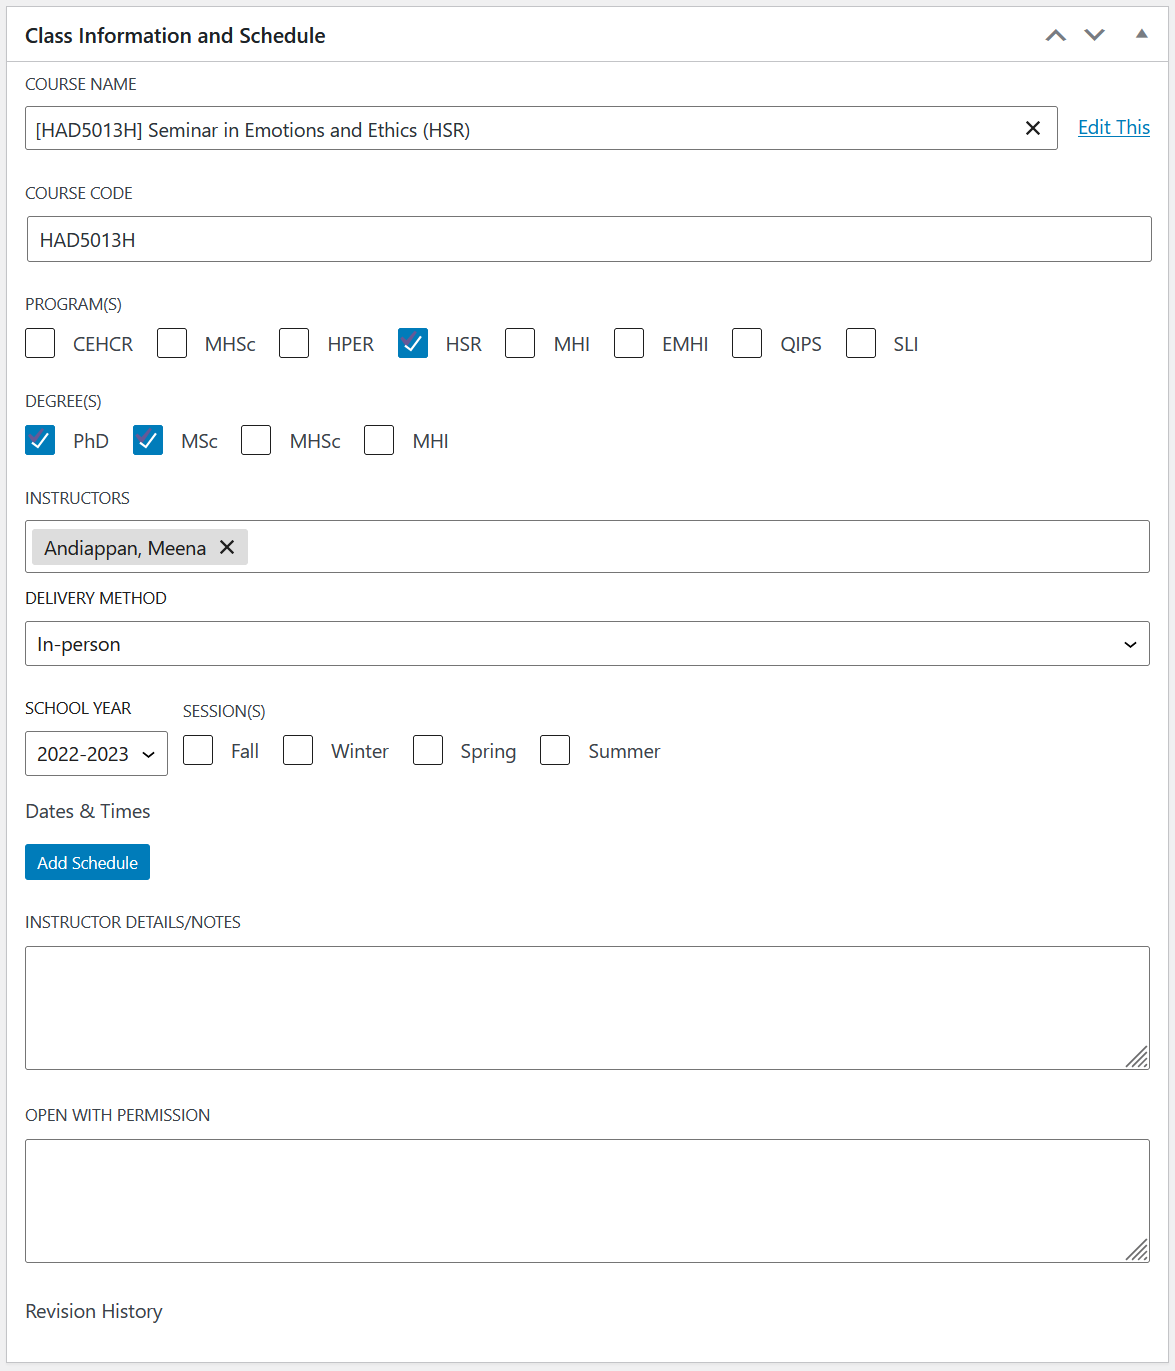
External courses
When required, add externally hosted timetable entries by inputting a custom course name, as well as the course description URL field. This method will not autocomplete any fields and requires manual intervention.
The course description field is only accessible when using a custom course name.
Add schedule
The Add Schedule button will bring up a window with options for input dates based on the course delivery format.
Add Schedule button
Timetable formats
There are several formats available to choose from when creating class schedules. If required, multiple formats can be used in a timetable entry by adding a new schedule for each format.
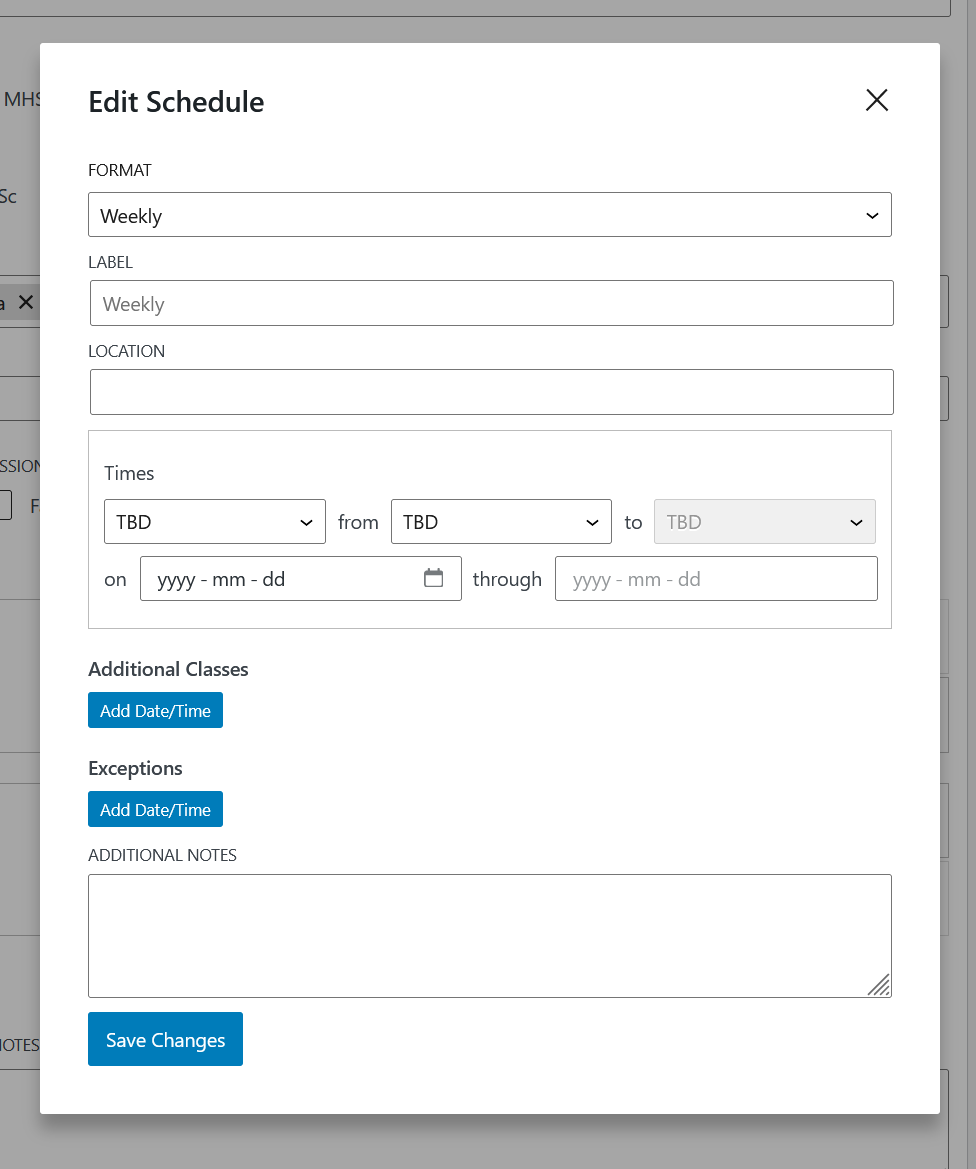
Weekly format
This is an example of the Weekly format window when selecting "Add Schedule". The weekly format automatically adds weekly dates based on the "to and from", as well as the overall duration selected. If required, exceptions can also be added into the weekly schedule to accommodate holidays, breaks or other calendar conflicts.
Modular format
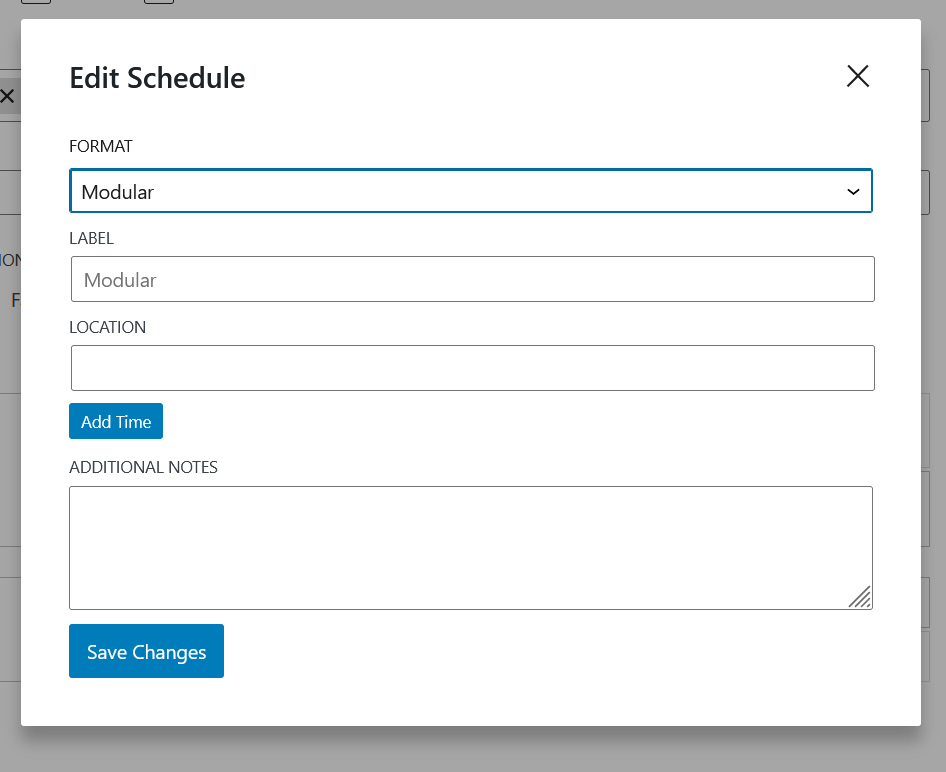
The Modular format schedule allows for an infrequent or non-recurring type schedule. Each time entry requires a specific description, location, and time. Multiple time entries can be entered into the modular format.
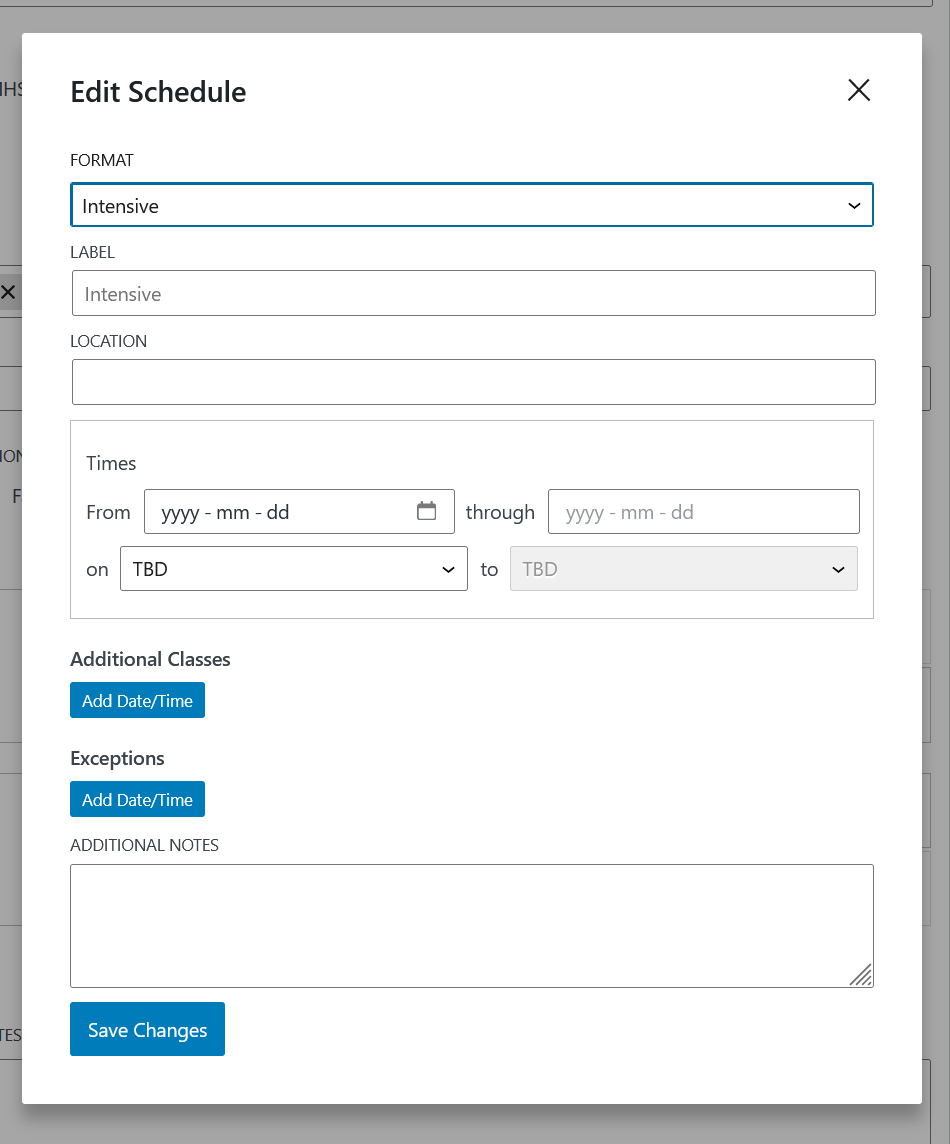
Intensive format
The Intensive format is similar to creating modular format entries. This format creates a special label on the live site denoting the class schedule as intensive for students. Like the modular format, multiple entries can be made, as well as exceptions for specific dates.
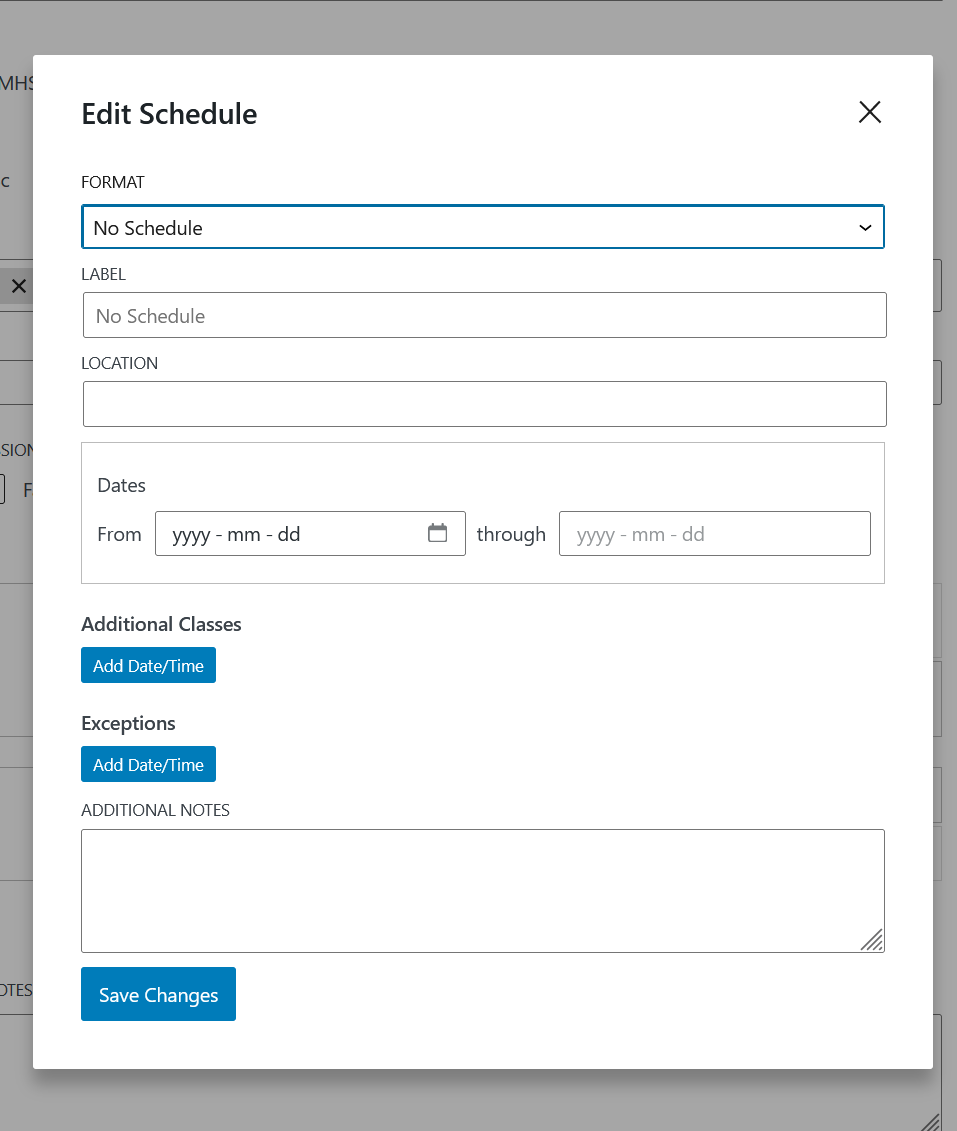
No Schedule format
The No Schedule format is used when there is no specific schedule for the current timetable entry or if it is TDB. This format is useful for creating notes, indicating workshops, or visually indicating that the schedule is to be determined.
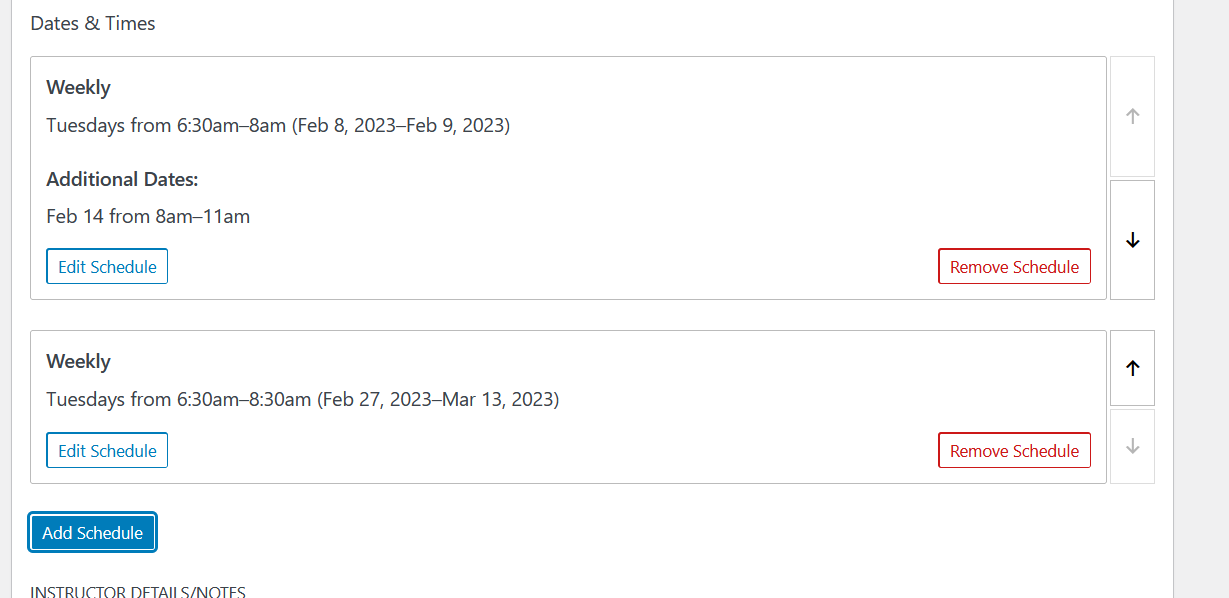
Moving Dates & Times
Individual entries can be moved up and down in order. This affects the display on entries on the live published website. To move an entry up or down, click on the arrow to the left on schedule entry in the "Dates & Times" area.
Instructor Details/Notes
Small notes or excerpts regarding the timetable entry can be added in this area. This is useful for specific information unrelated to scheduling details.